Last fall my mom was making a few of these for her local quilt show and sale. I thought they were pretty cool and have been keeping my eyes open for fruit themed fabric just in case I wanted to make a few.
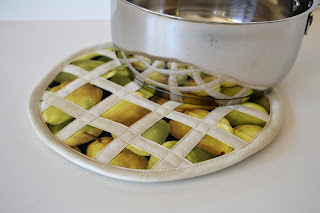 |
| Pear Pie Hot Pad or Pot Holder |
At the end of May at Calgary's Heritage Park's Gathering of the Guilds quilt show, I found some great fruit fat quarters and they followed me home! I already had a tan colored fabric that could be used for the lattice pie crust, some insulbrite and cotton batting and a quick trip into Fabricland netted the shining heat resistant fabric (normally seen on ironing board covers) that would be the pie pan backing.
Cutting Directions: I'm not much for finding a pattern for something that I can figure out, so I made a circle template from a piece of cardboard that was about 9" in diameter. For each pie, I cut 1 fruit fabric, 1 insulbrite batting, 1 cotton batting and 1 shiny fabric from the circle pattern.
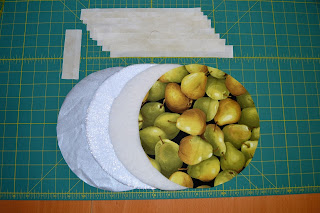 |
| Pieces cut for pie pot holder |
Then I cut myself some 1" strips for the lattice and pressed the long edges a scant 1/4" on each side, leaving me with a 1/2" wide strip to stitch to the top of the "pie". You will need eight pieces each at least 9" long for each pie.
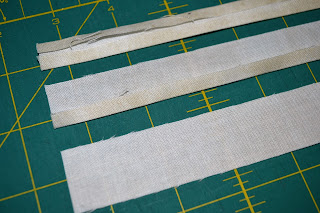 |
| Pie lattice |
And if you want a loop to hang your pie, cut 1 piece of tan fabric 1.25" x 4". Take your piece of fabric, press in half lengthwise and then press both long edges to the centre fold you just made. Then press again in half lengthwise and top stitch the edge opposite the fold. Fold in half as shown and top stitch the side opposite the fold.
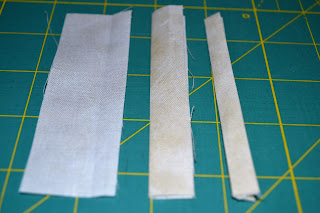 |
| Hanging Loop |
The next piece of the pie is the outer crust and I made some 2.25" bias binding to finish that edge up. You will need about 30" of bias binding per pie. (If you've never made bias binding before, just do a google search for Bias Binding Tutorial and you'll find some great YouTube tutorials.)
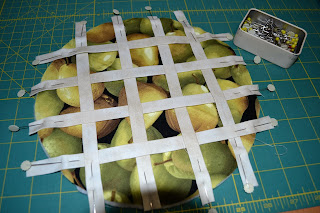 |
| Adding lattice to top of pie |
Step 1: Place cotton batting down with the fruit fabric on top. Using 8 pieces of fabric prepared for the lattice, weave 4 horizontal and 4 vertical pieces and space them out evenly in a way that looks good to you. I pinned my pieces down at each end to keep them from shifting before top stitching, but you could use a strip of fusible web or fabric glue and that would work just as well. Just remember if you are using pins to remove them before your sewing machine sews over them!
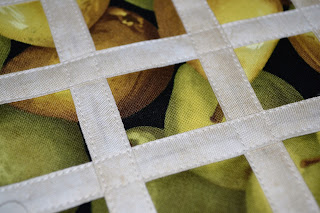 |
| Top stitching lattice on pie |
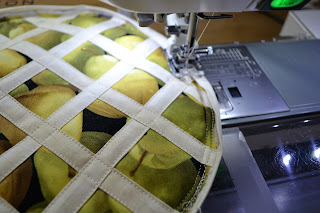
Using an even feed foot on your machine and tan thread to match your fabric, top stitch the lattice to your pie fabric/cotton batting. Trim the "crust" to your pie's circle shape.
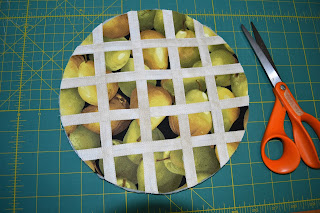 |
| Trim lattice to pie shape |
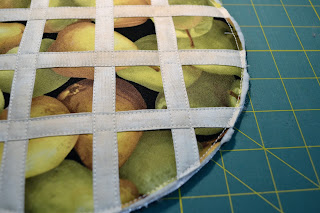 |
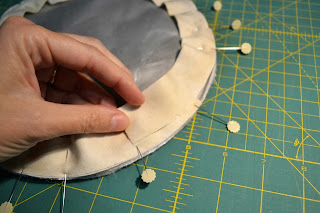
| Baste around all four pie layers |
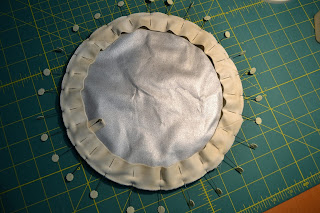
Step 2: Place the shiny heat resistant fabric wrong side up, add your circle of insulbrite batting and top with your pie filling completed in Step 1. Taking care that your edges line up, pin around the outside edge. Machine baste with 1/8" seam and large stitch length around the outside edge catching all four layers in your stitching.
 |
| Adding hanging loop |
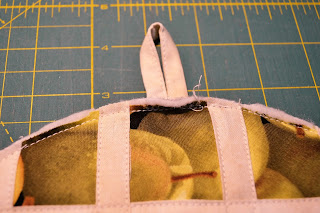 |
| Checking placement of hanging loop (You'll want to do this before stitching!) |
Step 3 (optional): Adding the hanging loop. and stitch to the backside of your layered pie. Before stitching, make sure that the hanging loop is placed where you want it from the front.
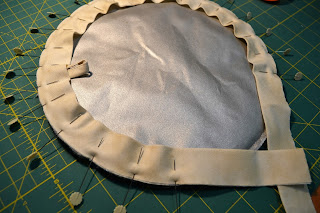 |
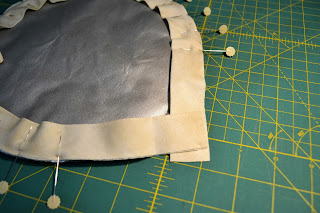
| Pinning bias binding to pie backing |
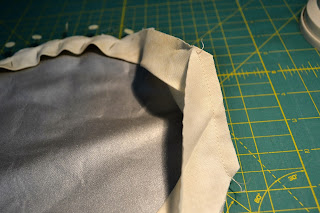
Step 4: Binding. Take your 2.25" binding strip and press in half lengthwise. Pin around the outer edge of your pie on the backside, leaving about 4-5" unpinned on each end as shown. The bias binding should curve nice and easy around the circle and you'll want to pin every inch or so.
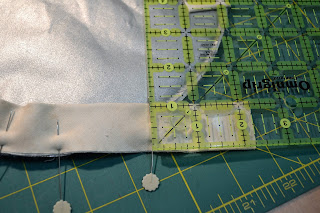 |
| Measure 2.25" from end of bias binding |
Mark 2.25" from one end of the binding with a pin.
 |
| Pin the end of the binding strip to your pie |
Leaving the 2.25 pin just in the binding, pin the end of the binding strip to your pie.
 |
| Overlap other end of binding to 2.25" pin |
Overlap the other end of the binding and trim to the 2.25" pin so you have an overlap of 2.25".
 |
| Remove all pins from binding ends |
Unpin the end and remove the 2.25" pin. (You may need to remove a few more pins to get the next step done!)
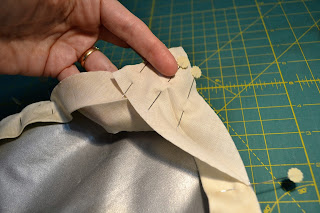 |
| Pinning the binding for the join |
Open up the binding and pin as shown. It may feel a little awkward if you've never done this before, but it will give you a nice finished edge with no noticeable joint. If you're having troubles, just remove a few more pins or fold the pie a little.
 |
| Stitching the join |
Stitch a diagonal seam as shown.
 |
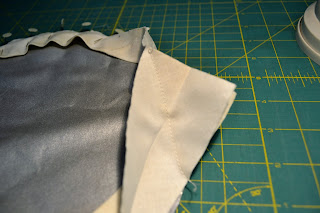
| Trimming the seam on the join |
Trim as shown. Press seam open and then refold this section of binding in half lengthwise.
 |
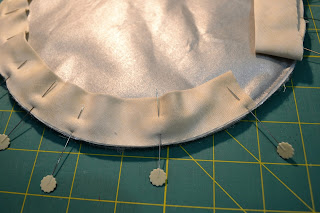
| Bias binding pinned around pie |
Finish pinning around the entire pie!
 |
| Stitch with 1/4" seam |
Stitch around the binding with 1/4" seam, removing pins one at a time as you go, all around. Go slowly and the bias binding will lie flat - if you hurry it will stretch and you'll have a lump of binding at the end you will need to ease in.
 |
| Turning binding to the top and top stitching |
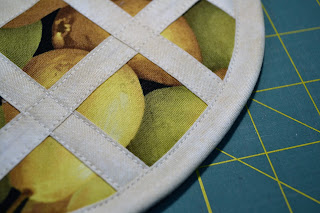
Turn binding toward the front of your pie and top stitch down with a tan thread on top and a gray thread on the bottom to match your pie plate! You'll have to stretch the binding a bit to cover the stitching and if you find it a little hard, you can always trim away a bit of the bulk around the edge. I like the look of a stuffed binding, so don't mind having to do a bit of stretching!
 |
| Finished edge |
And ta-da! Finished! I can't wait to use mine for fresh pie this summer!
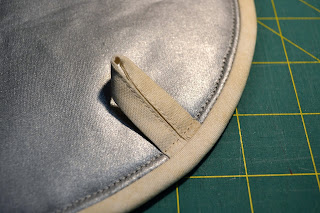 |
| Optional hanging loop |
The hanging loop lies flat on the back when your pie pot holder is being used.
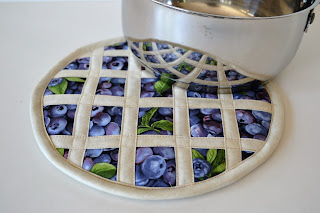 |
| Blueberry Pie Pot Holder or Hot Pad |
 |
| Blueberry Pie Pot Holder or Hot Pad |
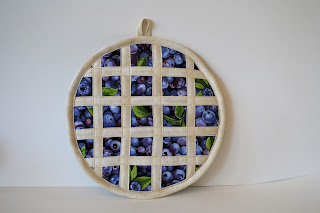 |
| Blueberry Pie Pot Holder or Hot Pad Front |
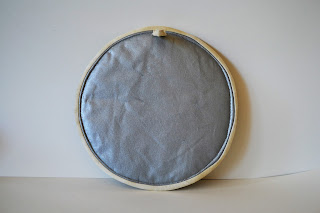 |
| Blueberry Pie Pot Holder or Hot Pad Back |
Let me know how your pie making goes!
--Ann


Can I share this tutorial at my guilds sewing event. I was nicely done
ReplyDeleteYes! Please share!
DeleteI just made one following these directions. Very easy to do and I love it. I used blueberries because my kitchen is blue and green, hanging it on my fridge till I need it. May I make these to sell for my Church bazaar? The proceeds all go to missions.
ReplyDelete