Showing posts with label mug rug. Show all posts

Thursday, 7 March 2019

Selvedge Mug Rugs

I collect the selvedge from my bought fabrics so I can make these pretty mug rugs. Normally, this piece of the fabric ends up in the trash, but I will cut them off both sides of a piece of yardage. When fabric is pressed and squared and ready to be cut, I line up my ruler and cut about 1" off the edges. This gives me the white strip with the fabric details like designer, manufacturer and colors plus about 1/2" of the actual printed fabric. Some people prefer to sew and not see any of the fabric, but I like the pop of color that I get with this width.
magpie quilts
Selvedge Mug Rug
These are simple, quilt as you go pieces. Cut your backing and batting about 1/2" larger all around than your desired finished size. Lay a single piece of selvedge from one corner to the opposite corner. Line up a second piece over the raw edge (the colorful fabric edge), overlapping about 1/4". Sew close to the selvedge edge of the second piece, through both fabrics, the batting and the backing. I use a white or off-white thread for almost all my selvedge piecing. Continue adding strips in this method right through to the corner.
Magpie Quilts
Selvedge Mug Rug
On the other half, tuck the raw edge under the selvedge edge and stitch through all layers. Repeat until your batting is covered with strips of selvedge.
Magpie Quitls
Selvedge Mug Rug with scrap binding
Trim your quilted piece to your desired finished size. I make mine 7"x9" and I can bind with a single strip of fabric cut the width of fabric. Or I will look through the left over pieces of binding from other projects to see if there is a piece or a few pieces that can be pieced together to make a binding.
Magpie Quilts
Selvedge Mug Rugs
Super fun to make, these mug rugs make great gifts!

--Ann

Saturday, 13 February 2016

Mug Rugs with a printed picture Tutorial

Recently I made a few mug rugs with a little saying on them that I printed onto printable fabric.
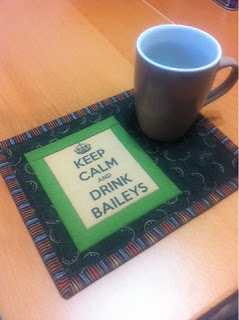
Bailey's Mug Rug - SORRY, SOLD OUT!
I also found some photos from my garden over the last few years and decided to see how they would look as mug rugs.
Floral Photo Mug Rugs
These little sayings about how to keep calm are popping up all over my social media & I grabbed this one as my starting point. You can always use your computer to make something that's totally original, dress it up with a fancy font and save it to print whenever you need it.

To grab a photo from the web - first check for copyright. Not all images are free for the taking, so take the time to go to the original source of the photo and ask. When you have your permission, go to the image you want and right click it. You should get a little pop up window that has an option to SAVE this image to your computer. Please save it somewhere you can find it back, like on your desktop and maybe take the time to give it a descriptive name, especially if the original file name is a series of letters & numbers that mean nothing to you. Better yet, use one of your own original photos and you won't have to worry about copyright.
http://www.staples.ca/en/Avery-Printable-Cotton-Fabric-White/product_522210_2-CA_1_20001

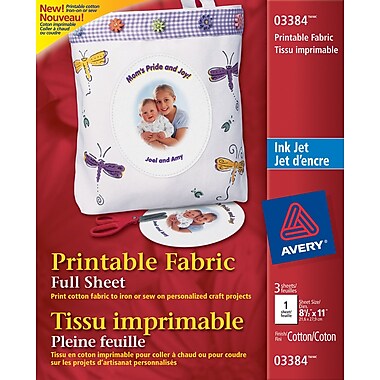
You can pick up printable fabric from an office supply store like Staples, or a craft supply store like Michael's or from your local quilting shop. These are all set up with fabric fused to a paper back so they will feed through your printer easily and without any fuss. I've tried printing on my own fabric with a product called "Bubble Jet Set" and fabric ironed onto freezer paper and the results were not near as good - but you may have a different printer and may get better results than I did.
Bailey's Mug Rug in use! 
Use your word processor to set up your page. A single sheet of printable 8.5"x11" fabric will make 4 labels, so make all four the same or find four different images to print. I reset my page margins on my document to .5" and added my first picture. I clicked on the picture and used the little boxes on the corners to stretch and size the picture until it was close to 3.5"x4.75". If you only use the corners to change the size of your picture, you will keep the proportions and it won't stretch out too long or too wide. If you use the side arrows to change the size, you will get stretching and the final picture will not have the same proportions as the original. If that happens, just use CTRL Z (PC users) or COMMAND Z (Mac Users) to go back a step or delete the picture and start over by importing the original picture again.

When you have the photo sized right, select it again and use CTRL C to copy (or right click and select copy). Paste it 3 more times so you have 4 pictures on your page. Or if you are doing four different pictures, add them one at a time and resize until they are all completed. You want at least 1/2" clear space between them so you have room for seam allowances when you are sewing.
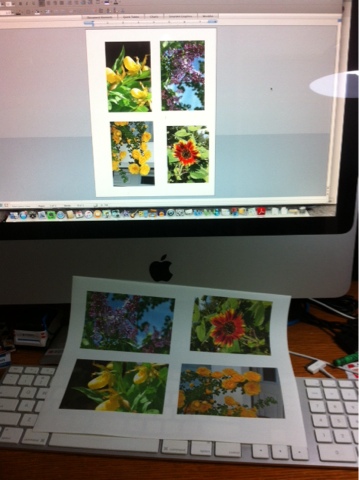
Here I am printing some photos taken in my garden onto a fabric sheet.
At this point, make sure your document is SAVED so you don't loose your work - I like to save every time I complete a step so I don't have to start over if something doesn't go right. If it all looks great on your screen, print out on a piece of plain paper to make sure your printer has enough of all ink colours to make a good print and to make sure you've sized and spaced your pictures so there is room for a seam allowance around each one. Make adjustments to your document as needed and then print on your printable fabric.
Sunflower Mug Rug - FOR SALE
Now, you can cut 1/4" around each picture. I leave the paper backing on until it is time to sew the pieces together.

Alternate method to set up page for printing - use your photo program and print using it's presets.
Yellow Lady's Slipper Mug Rug - FOR SALE
Depending on your picture and the size you want your mug rug, the next steps will be up to you for measurements. I like my mug rugs to be 7"x9", but will often "eyeball" it until I have the mug rug together and quilted and do my final trim to size right before I adds binding.

I placed my picture on the left side of the mug rug. Removing the paper backing first, I add a strip of background fabric to the top, bottom & left side of the picture. Then, I add a piece of fabric to the right side of the picture so the unquilted piece is slightly larger (about 1/2") than the finished size I want. (For me, a good mug rug size is 7"x9" so that I can use 1 strip of 2.25" fabric by the width of the bolt, usually 42" for the binding.)
Lilac Mug Rug - FOR SALE
Quilt as desired! I quilted in the ditch around the picture and free motion quilted the background. I've also made these with straight line quilting that echoed around the picture.

Trim to the finished size you want and add binding.
Yellow Rose Mug Rug - FOR SALE
Gift to your fav person or keep for yourself! Make yours with a vacation photo, pet photo, special someone - the possibilities are endless!

--Ann

Friday, 8 January 2016

Christmas Mug Rug

Now that Christmas is over, I still have a few projects to share with you. One of the quilt guilds I belong to had a mug rug exchange at their Christmas potluck. I found a great mug at Home Sense that had a beautiful poinsettia on it. And I had a great Robert Kaufman poinsettia fabric at home that was a pretty close match.
Poinsettia Mug Rug
I added a checkerboard border from some ivory & green Christmas fabrics. A little quilting with an all over meandering pattern & a green border and this mug & mug rug were ready to go!
Finished Poinsettia Mug Rug
Love the result! Might have to make one of these for myself if I can find another mug!

--Ann

Friday, 2 January 2015

Tis the Season for Mug Rugs

I recently passed 400 likes on my Facebook page and to celebrate, I challenged my readers to post a picture of their favorite mug and I would make a mug rug for the first 5 mugs posted. I ended up with 7 pictures of mugs posted, so I may just end up doing them all, it will just take me a little longer!

Here are the first couple done:


 I am trying some new techniques to me on these mug rugs (or some that are not used very often). The mug rug above for Brenda is using a curved piecing technique I learned at Quilt Canada when it was here in Calgary in 2010. I haven't used it since, but thought the mug had some cool lines that would work with that technique.


And Joyce's mug is a beauty! I had some fabric on hand that I wanted to use, but not cut up into smaller pieces. I also learned to couch a decorative braid at Quilt Canada 2010 and tried that technique here. I wrote out Joyce's name with a disappearing marker and slowly zigzagged my way through her name. In hindsight, I should have quilted the piece first and then couched the name, so the quilting lines don't run through the name.

I do hope these wonderful ladies love their mug rugs and I'll show you the rest as I get them finished!

--Ann
 Pin It

Tuesday, 7 October 2014

Selvage Mug Rug

Wikipedia defines a selvage (US English) or selvedge (British English) as a self-finished edge of fabric. Normally, these are cut off and discarded in the process of making a quilt (or any fabric article), but I've been saving mine for just this kind of project.
Selvage mug rug
A mug rug is a little mini-quilt, larger than a coaster, smaller than a placemat, that you can place your cup and a snack on without it taking up too much space. The beauty of these ones are that they are a great example of making something beautiful out of what otherwise would be trash. 
Selvage mug rug in blue
 First, you need to save your selvages. I cut mine with about 1/2" of the main fabric attached. You'll see why when we start sewing them onto the mug rug. This will give you about 1/4" of the main fabric showing after sewing, so if you want more or less fabric showing, cut your fabric selvages accordingly.
Cutting your selvages
 Next, cut a backing fabric and a piece of batting just a bit larger than you want the final mug rug to be. I like my mug rugs to finish at about 7" x 9", so I cut my backing and batting 8" x 10". This is also a great way to use up those batting scraps that aren't big enough for anything else.
Preparing the backing & batting
 Lay your first selvage strip across the diagonal. Take a second selvage strip and lay it parallel on top with the selvage edge about 1/4" overlapping the raw cut edge of the first strip. Using a matching thread and a straight stitch (or a decorative thread and decorative stitch - anything goes, really!), sew just a little inside the selvage edge through all layers. This will quilt your mug rug as you go and when the top is done, all you will have left to do is the binding.
Starting to add strips
 Continue stitching until half of your mug rug is complete and then carry on and do the other half, remembering that you will be slipping the raw edge under the selvage edge on this half.
Top stitch at edge of selvage
 This is what your project should look like - roughly the shape you want and with as much or as little fabric showing as you prefer. Play around with colours and the amount of fabric vs selvage showing - it's only scraps that would otherwise end up in the landfill!
Pieced, quilted and ready to trim!
If you are like me, you will want to make more than one of these cute mug rugs, and to make this step easier, you can use painter's tape to mark the  finished size you want on your ruler. You can see that I've marked my ruler at 7" x 9". Place over your pieced strips, and cut the first two sides square. (I've cut from the back for this photo as it's easier to see than with the stripped side.)
Trimming the mug rug
 Turn your piece 180 degrees, line up your painters tape on the cuts you made in the previous step and cut the remaining two sides square.

Trimming the mug rug
And here's your mug rug, pieced, quilted and ready for binding. 
Trimmed and ready for binding
There is a definite up and down to these mug rugs because of the text on the selvage edges, so if you are making a matching set, watch how you place that first strip so they all angle the same direction.
Blue selvage mug rug (slant top left to bottom right)
Blue selvage mug rug (slant bottom left to top right)
Add binding using whatever method suits you best - google "how to bind a quilt" if you are unsure and voila! You are finished!

Keep the mug rug for yourself or package it up with a mug, some coffee/tea/hot cocoa, a package of cookies and give as a gift to someone special!

Until next time!
--Ann

PS. I apologize for the crazy inconsistent fonts! Sometimes technology baffles me!

Pin It

Monday, 25 August 2014

Monday Mumblings

Good sunny Monday morning!
I have a huge list of things to get done this week and not sure if I'll actually get anywhere on that list, but blogging seems to be a good way to procrastinate!

American Banner from Moda Coasters - For Sale
Last week we took the RV out for a few days and I took along my sewing machine and a few projects. I've had so many big quilts that I've been working on, and it was a nice change to work on some smaller items and actually see a few finished.
Blue Table Runner - For Sale
This denim blue fabric line is great. I am going to find a pattern for a tiered skirt and get a little more of it and actually sew something for myself from it. Blue is still my fav color!
Blue Table Runner - For Sale
This cute double four patch table runner is an easy pattern to make up and you can make it from fat quarters in your stash or buy some specially just for this. Pattern is here or click on the Tutorial tab above!
Denim Blue Mug Rug - For Sale
And these mug rugs were made from the selvedge edges of the fabric - usually thrown in the garbage, but not this time!
Denim Blue Mug Rug - For Sale
These were quilt as you go, so when the top was done, so was the quilting! I have a whole tub of selvedges, so there will be plenty more of these in the coming weeks!

Piecefully yours!
--Ann

Pin It

Monday, 17 June 2013

Mug Rugs or Mug Mats

I love these little mini-quilts that can be used as coasters under your beverage of choice. But it seems that they are a phenomenon only known to quilters! I thought they would go over well at the last few craft sales I did, but people were saying "Mug rug? What's that?" 

Owl Mug Rug
 Our quilt guild had their year end potluck last week and a few of us exchanged mug rugs with matching mugs.  I found a cute mug with an owl on it at the local Home Sense store. (I love shopping there!) After sketching out the owl, I used fusible web to applique the pieces in place on the mug rug.

Blanket Stitching
Cute owl!
 Then it was off to my sewing machine where I used the blanket stitch to stitch around all the pieces. The beak and black dots on the eyes are just permanent marker.
Tulip Mug Rug
This is the mug rug I received in the swap - a pretty tulip mug from Great Britain with a tulip mug rug! So cute!

--Ann

Monday, 29 October 2012

String Piecing Mug Rugs

I am a scrap fabric hoarder saver and this past week I took out my string fabric scraps. Strips of fabric that are larger than 3/4" and smaller than 2" are perfect for string quilts. I used some of my scraps up last year in this quilt that was made with a blocks from my online quilting friends:
Scrappy strings Baby Quilt
But I still have quite a few left and thought I'd use them for some craft sale projects. First thing I did was separate the strips by colour
Scrappy Strings ready to sew
 And on a piece of batting that was about 7"x9", I started sewing strips down, quilting as I went. The first strip goes on right side up and then the next strip right sides down on top of the first strip, lining up the edges. Sew a 1/4" seam and press open. Repeat on both sides of the first strip until the batting is covered.
Adding string scraps to batting
Trim square - I trimmed mine to 6.5"x8.5". Add backing fabric and bind as you would a normal quilt. Or if you're adventuresome, try turning your backing fabric to the front as binding.
Scrappy String Mug Rugs
And there I have some mug rugs (snack mats) that used up some of my scraps and hopefully will be great sellers at the craft sale I'm in on Saturday!

--Ann

Linking up with:
Quiltsy WIP Wednesday #34
Needle and Thread Network WIP Wednesday #63
Freshly Pieced WIP Wednesday

Tuesday, 29 November 2011

Coffee Mug Rugs

A fabric panel of vintage coffee signs was the starting inspiration for these quilted mug rugs. I wanted a retro feel and choose a trio of fabrics that continued that theme. Usually I make my mug rugs with the left-over pieces of batting from my larger projects, but this time I thought I would try to use Insul-Bright. Insul-Bright is used in potholders and hot pads because of it's ability to block heat from traveling through from one side  to the other.
Vintage Coffee Sign Mug Rugs
 I was not prepared for the amount of stretch that happened when I machine quilted the first mug rug. I normally don't have any problem with that, especially when using my walking foot on the sewing machine. Needless to say, the rest of the mug rugs were securely pin basted before quilting!

Coffee Mug Rug
Red Coffee Mug Rug
Green Coffee Mug Rug
Hope you're getting all your Christmas shopping done!

--Ann

Magic Tiles Quilt

Sometimes, I just want to go back and remake a quilt I've done before and this is one of those times. I had a bundle of muted green and...